1
Your dashboard — everything in one place
This is your home screen. You'll come here every day.
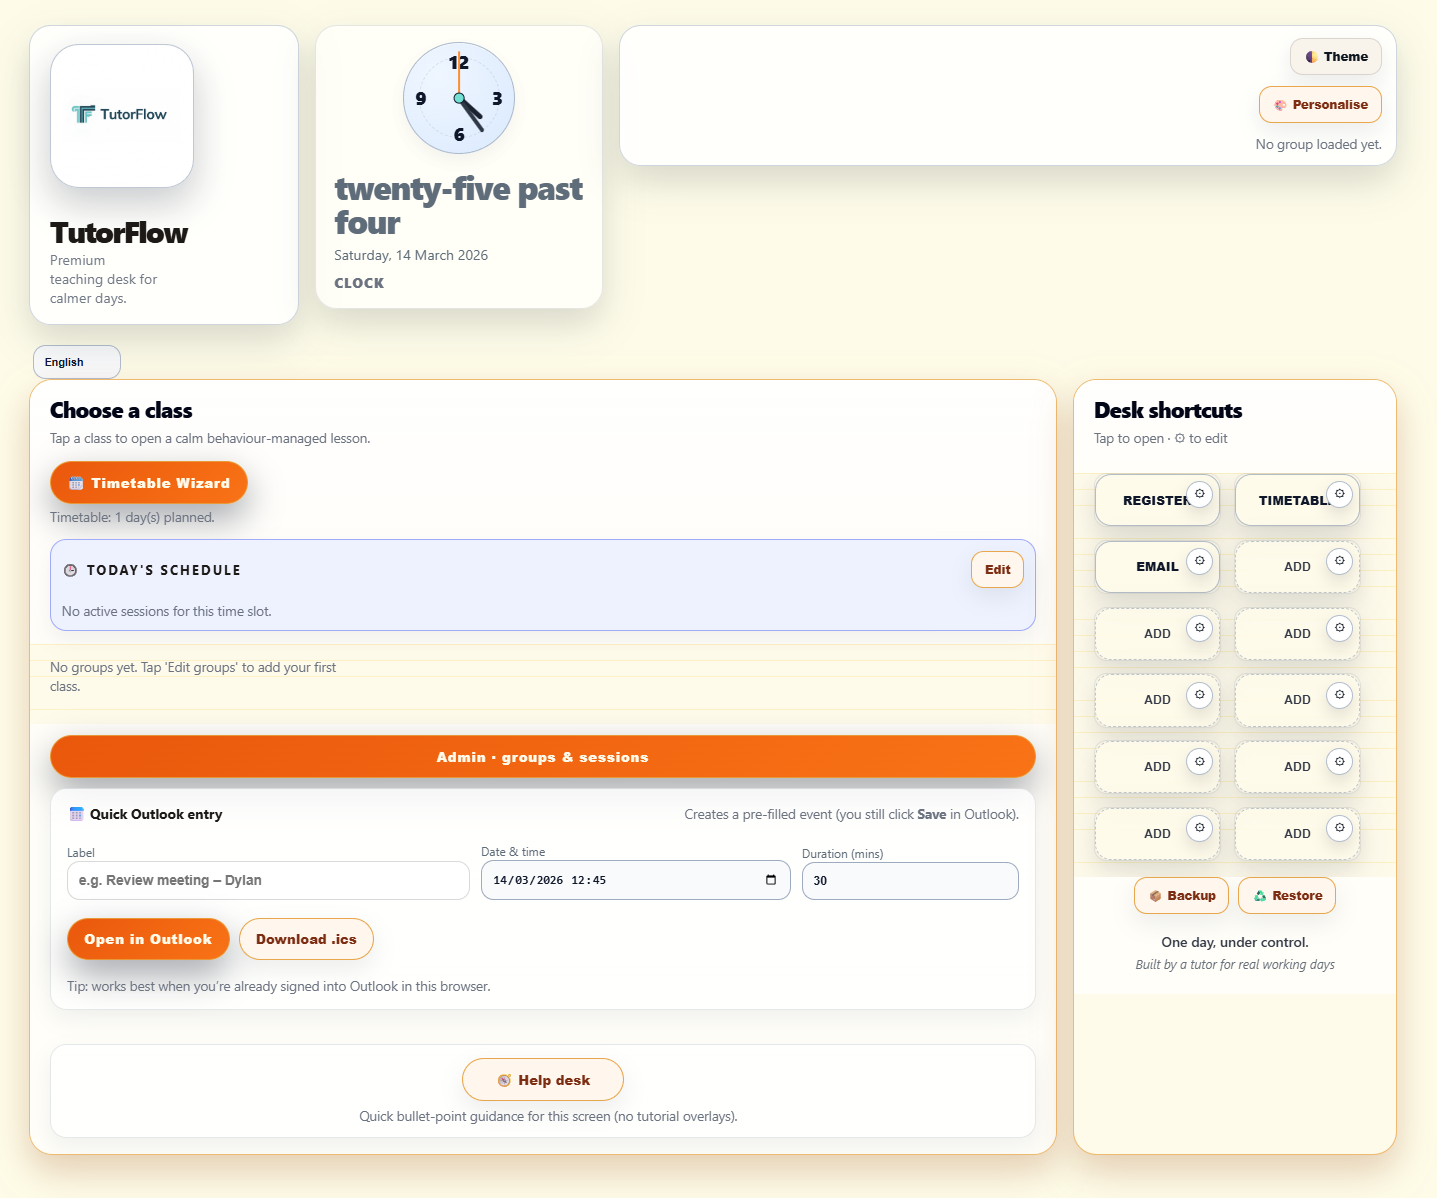
Click here to add your classes
- The top row shows your brand, a live clock, and your current group panel
- The main panel shows your classes and today's schedule
- Desk shortcuts on the right give you one-click access to your most-used tools
- To get started, click Admin · groups & sessions (the orange bar)
Everything is stored locally on your device. Nothing leaves your machine — no accounts, no cloud.
2
Add your classes
Create one group per class. Add your learners' names.
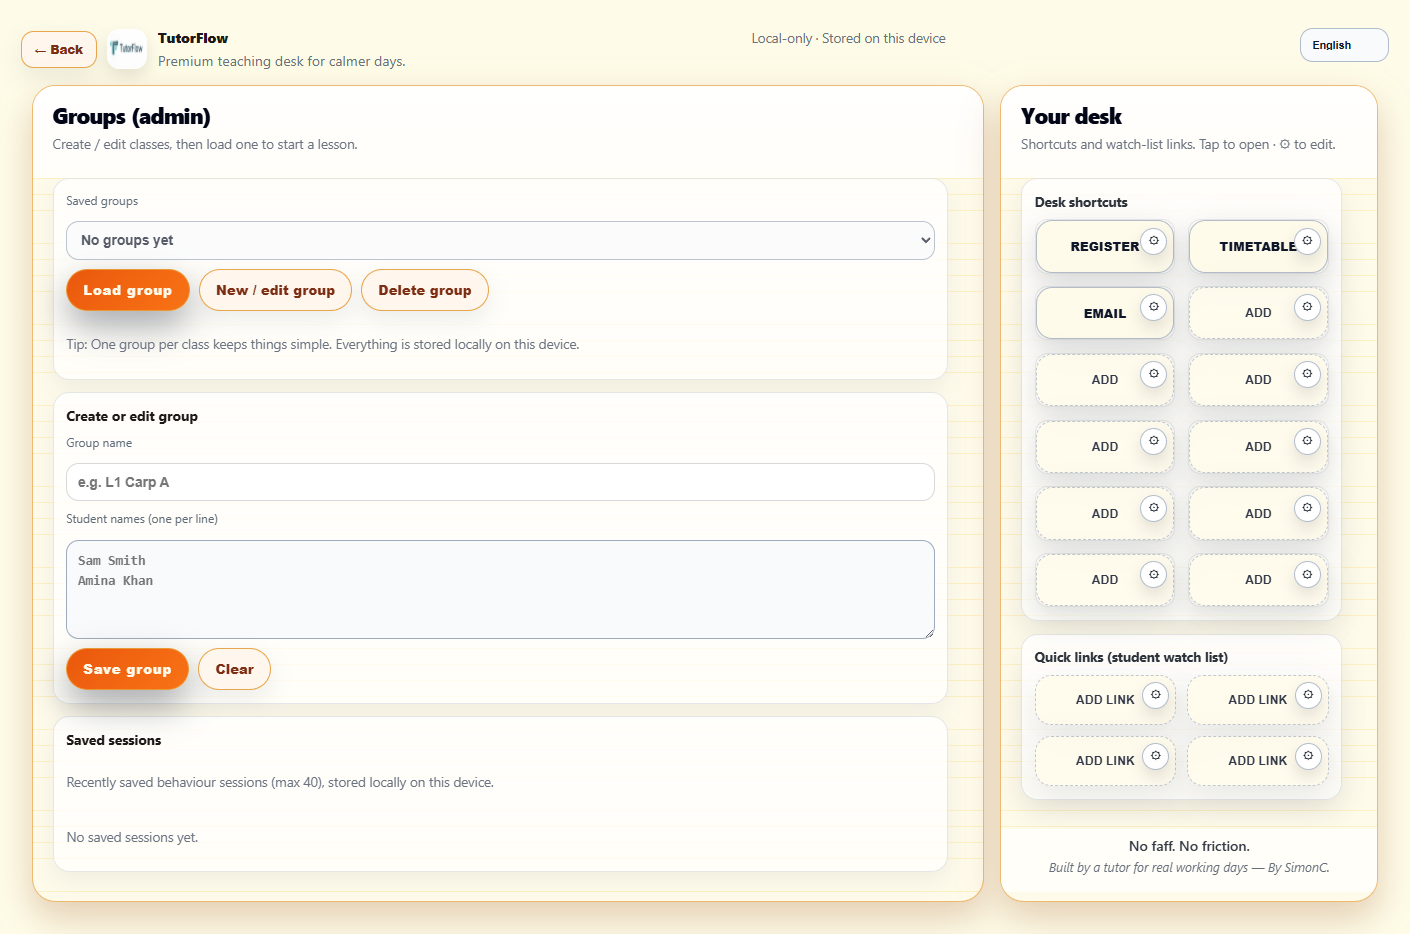
Type your class name here
- Type your class name in the Group name field — e.g. L1 Carp A
- Add your students in the box below, one name per line
- Click Save group when done
- Repeat for each class you teach
One group per class keeps things simple. You can edit groups any time from this screen.
3
Open the Schedule Wizard
Tell ClassAnchor when you teach each day.
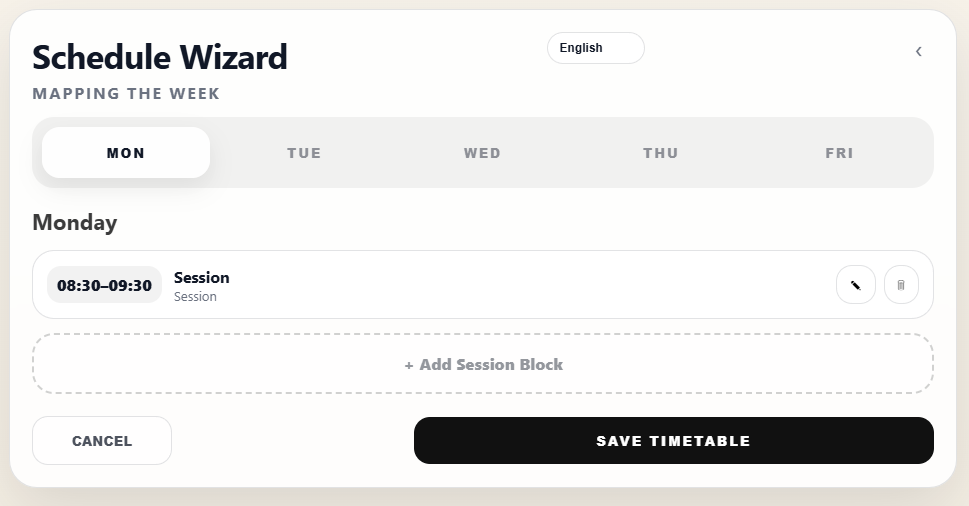
Click to add your first session
- From the dashboard, click Timetable Wizard
- You'll see Monday selected by default — start here
- Click + Add Session Block to add your first teaching slot
- Work through Mon to Fri adding all your sessions
You only need to do this once. ClassAnchor will use your timetable every day to show your current session.
4
Build your daily timetable
Add blocks for each day until the week is mapped out.
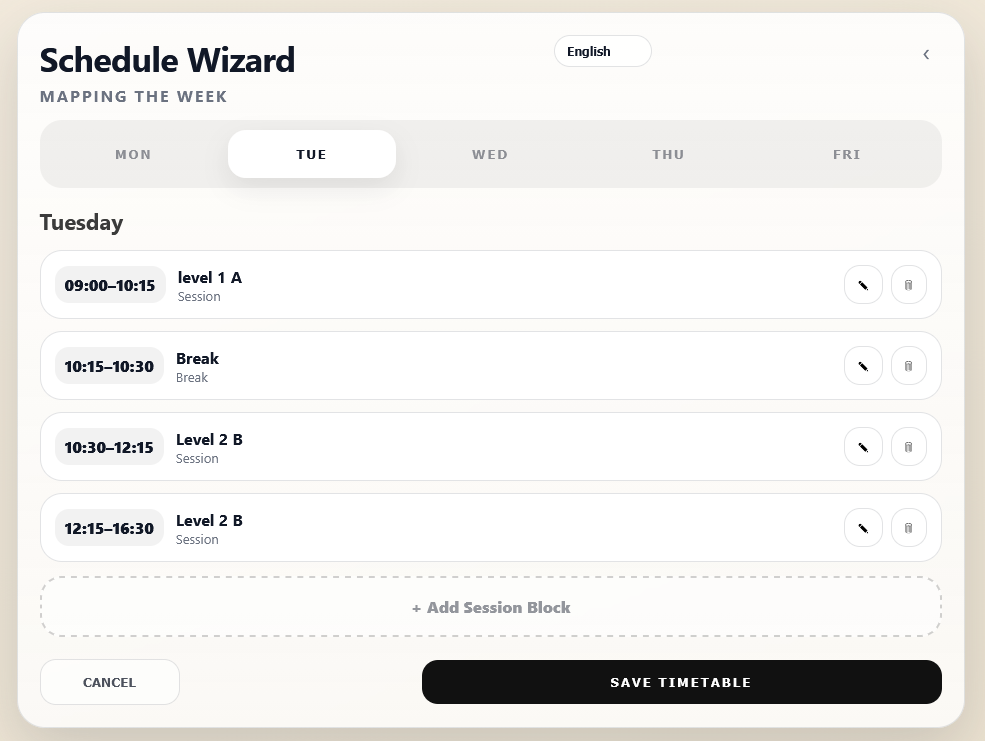
Repeat for each day Mon–Fri
Each block = one time slot
Edit or delete anytime
Save when all days are done
- Click + Add Session Block and set start/end times
- Choose the Type — Session, Break, or Tutorial
- Add a label so you know which class it is — e.g. Level 1 Carp
- Move through Mon → Fri adding all your blocks
- Click Save Timetable when the week is complete
ClassAnchor will automatically highlight your current session on the dashboard based on the time of day.
5
Set up your Desk Shortcuts
One click to everything you open every day.
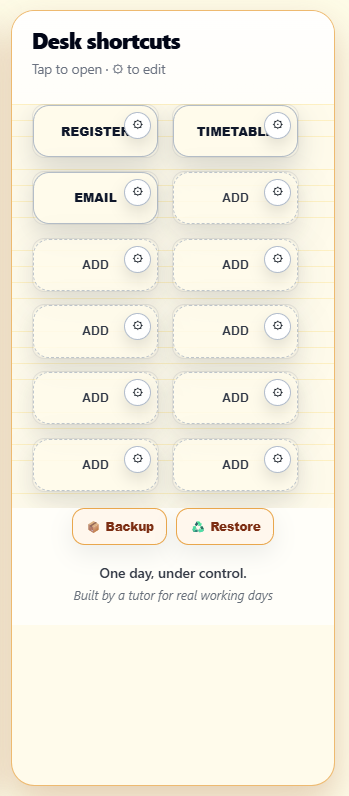
Click ⚙ to set a shortcut
- Find any ADD button in the Desk Shortcuts panel
- Click the ⚙ gear icon on it
- Type a label and paste the URL you want it to open
- Repeat for all the tools you use daily — your register, email, timetable, college systems
REGISTER and TIMETABLE are pre-set placeholders. Click their ⚙ to point them at your college's actual systems.
6
Editing a shortcut
Add a label, paste a URL, pick a colour — done.
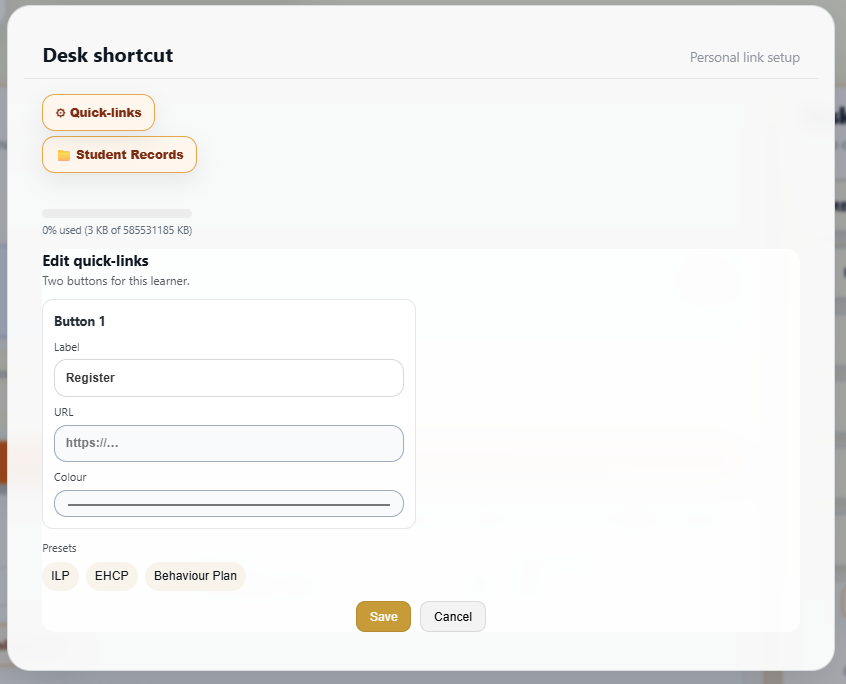
Your button label
Paste your link here
Quick presets — one click to fill
- Type a Label — this is what appears on the button, e.g. Register
- Paste the URL — the link it will open when clicked
- Pick a Colour to help you tell buttons apart at a glance
- Use the Presets (ILP, EHCP, Behaviour Plan) to fill common links instantly
- Click Save — your shortcut is live on the dashboard
You have two tabs — Quick-links for general tools, and Student Records for learner-specific links like ILPs and EHCP documents.
You're set up.
Your classes are in. Your timetable is mapped. Your shortcuts are ready.
ClassAnchor is now your desk — open it every morning and start calmer.